
As per my usual, my directions probably seem more complicated than they need to be. These are just some tips and tricks that help me with my drawing style... you may not need them. And if you're not a perfectionist, you can skip this part altogether:
• This is not a fast pattern to draw... the third step especially is a real time-suck. I found that it helps to use a smaller pen for the third step than you use for the first two... and (like a lot of patterns) it really helps to slow it down while drawing it.
• It sounds nit-picky but if you do all your circles at once, then all of your lines, then switch pens for the swoop that connects those lines you won't have to keep switching back and forth (and your swoop-to-line connections will be neater).
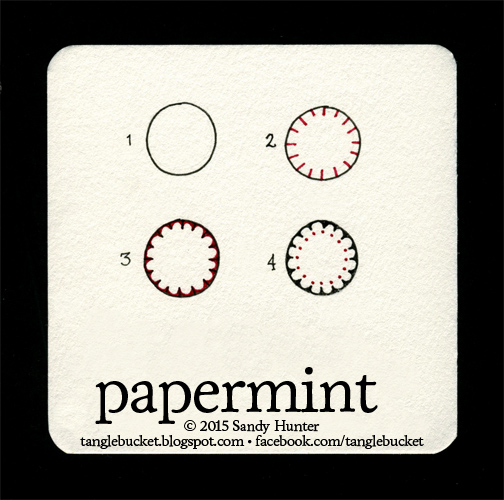
• You could just draw a circle and park a flower in it, but the lines that go in first provide consistency in spacing and depth. They also keep the lines from going too far into the circle... otherwise it looks more like a flower. I draw from the inside to the edge because that works really well to control the length of the lines.
• I section off a circle the same way I section off my mandalas so I don't have to use a ruler or measure. Imagine a clock: the first line is drawn at twelve, then six, then three, then nine. I then cut those sections in half until I have the number of sections I want. Center each new line between two existing lines, and then draw the opposing one directly across from it.
• I draw the dots in step 4 in the same order that I do the lines... I don't just go around the inside of the circle. I don't know why it works, but drawing them across from each other helps me keep the dots centered on each line.
I can't believe I'm even saying this, but I think I should have used red for this one.

Using different numbers of lines/lobes will give you a different look. So far I've found that 12 is the easiest to section off and looks the best. And 24 makes a nice throw rug.
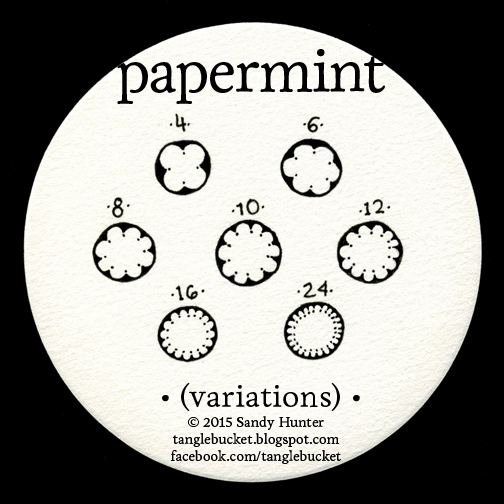
A little shading adds some oomph... do you see innies or outies?

>>> An exciting update...!!! <<<
I was looking at the above tile last night (after I'd already published this post, naturally... that's when the good ideas roll in!), when it hit me: this pattern would look SO AWESOME with one of Lynn Mead's dewdrops in the center! I'm rather fond of daisies so I was quite taken with this idea. I contacted Lynn, and she graciously accepted my challenge and sent me this beauty. If you want to learn how to draw your own dewdrops, you know what to do! >>> .oOo.

I absolutely love the contrast between the stark black & white and the soft grays... collaboration between tanglers always brings new and unexpected surprises!
Enjoy!
That's all, folks... happy tangling!
• ❃ • ❋ • ❁ • ✿ • ✽ • ❀ •
Thanks for stopping by!
Feel free to join me here,
where I frequently share artsy things that inspire me,
invite tanglers to share art,
crack silly jokes,
and offer up the
occasional
tangle
prompt.
:oD
❀